Register a Node
Before you connect a Node to your Crosser Control Center organization you have to create it either by adding it manually with unique credentials, or use the 'registration key'. The concept of 'registration key' addresses rollouts where you want to deploy multiple Nodes within a short period of time.
You can get access to the Docker Repository for the Node and access to the installation package when clicking on 'Advanced Options for Adding Nodes' 
Individual-Node registration
Go to Manage -> Nodes and click on the tab 'Register Nodes'. Specify the Node Name that you would like to use, select 'Production' or 'Dev And Test', click 'Add' ( ).
).
If you select 'Production', all events from the Node will show up in the Crosser Control Center. 'Dev And Test' is supposed to be used for testing Nodes on which you might expect more warnings/errors which you don't want to end up flooding your logs for production Nodes.
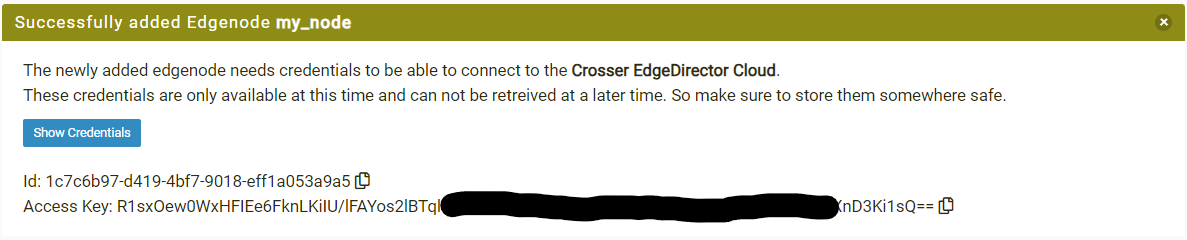
Once the Node is created, you get a message with a button 'Show Credentials' ( ) which you can click to view the Node's credentials. Note that the credentials can not be seen again once you leave the page due to security reasons so make sure to either save the credentials or put them into the docker-compose-file or Windows Installer directly. If you plan to setup the Node later on, save the credentials somewhere.
Once the registration is done you can go ahead with the Node setup.
https://crosser.io/documentation/user-guide/crosser-node-runtime/node-installation/
Registration Key
In case you want to roll-out multiple Nodes within a short period of time, there is an option to create a 'Registration Key' which can be used as a global key to setup multiple Nodes. On first connect every Node will negotiate individual credentials with the Crosser Control Center.
To create a 'Registration Key' hit the checkbox 'Advanced Options for Adding Nodes' which opens two more menus at the bottom of the page.
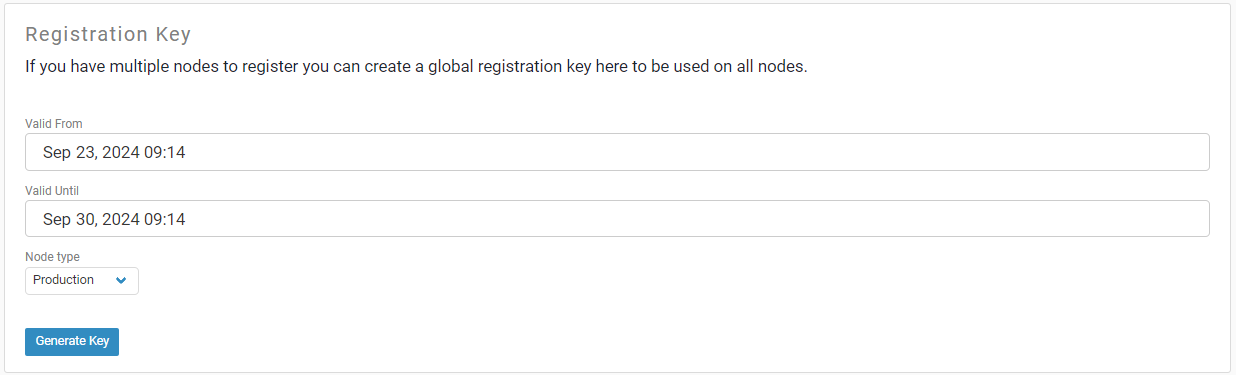
The first dialog lets you specify the validity of the 'Registration Key'. Specify the life-time and Node type and press 'Generate Key'. ( )
)
Once done you will get a new message with a similar dialog as for registering an individual Node. Click on 'Show Registration Key' to see the actual payload of the Key.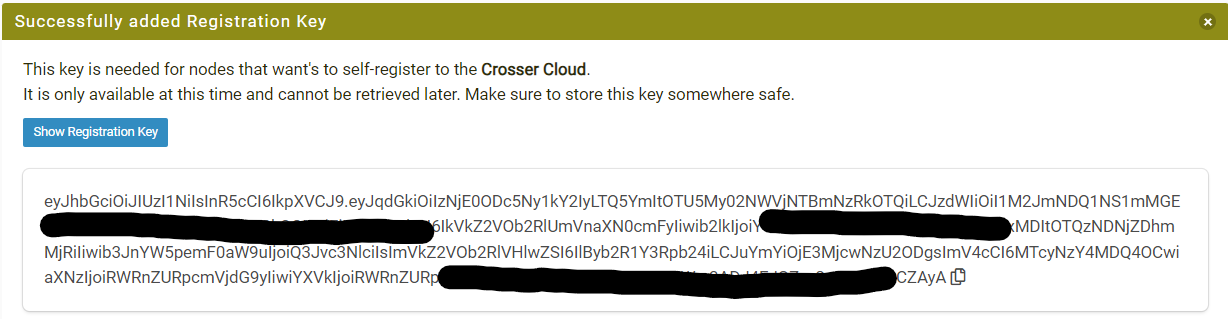
Just below you will see another menu which allows you to specify 'Node naming pattern' which you can use to add an increasing index to your Node Names.
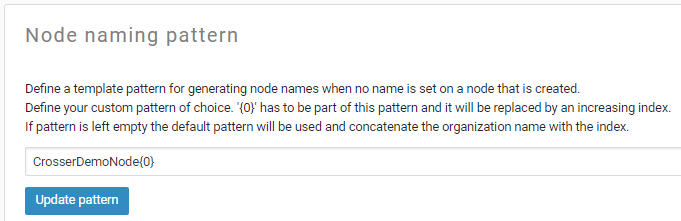
When a Node connects to the Crosser Control Center with the 'Registration Key' for the first time, the name will be determined by the pattern.
Once the registration is done you can go ahead with the Node setup.
https://crosser.io/documentation/user-guide/crosser-node-runtime/node-installation/
Active Nodes
Once you have started the Node and it authenticated successfully at the Crosser Control Center. it will sow up on the 'Active Nodes' page.
On this page you see the status of the Node online ( ), offline(
 ) or out-of-synch (
 ). The Node will be marked as offline if we have not received any 'ping' in some time. The actual timeframe comes down to the communication interval specified in your Node setup. By default the Node will ping the Crosser Control Center every 10 seconds. If we miss 100 pings, we will mark the Node as offline.
A Node can get 'out-of-synch' if there was a change in a parameter used by a deployed flow but the flow has not been synched yet.
Besides that you see the Name, Type ('Production' or 'Dev And Test'), Labels, Parameters, Flows, Version and actions.
Search Documentation
Page Sections