Microsoft Teams Modules
Modules Covered
- Microsoft Teams Send
- Microsoft Teams List Chats
- Microsoft Teams Send Chat
These modules can be used to send messages to Microsoft Teams channels or chats.
Entra ID App
The Microsoft Teams modules use Oauth 2.0 for authentication and requires an enterprise app in Entra ID with the right permissions. If you don't already have such an app, follow these steps:
- Firstly visit Entra ID here to create a new App:
- Give the App a name
- Specify who should be able to signup using the App, most commonly 'single-tenant'
- Set the Redirect URI as https://cloud.crosser.io/oauth-confirm (platform 'web')
- Once the app is registered you will see your client_id (called 'Application ID' in Entra ID). You will also need your tenantID, which can be found on the 'Overview' page. Copy both of these values.
- Navigate to the 'Certificates & secrets' tab and create a new secret_id: In 'Client secrets', select '+ New client secret'.). Save the value of your new secret.
- Now navigate to the 'API permissions' page. Click 'Add a permission'. For these modules to work you need Channel.ReadBasic.All, Team.ReadBasic.All and ChannelMessage.Send for the 'Microsoft Teams Send' module and ChatMessage.Send, Chat.ReadWrite permissions for the chat modules.
Create a credential in Control Center
Note: When you create a credential for use with these modules you do that as a specific user. This user will then be the 'sender' of these messages.
Follow these steps to create an OAuth 2.0 credential in Control Center for use with these modules:
- On the Credentials page, click on the '+' button to create a new credential. This will open up the below tool:

- Select the OAuth Authorization Code Grant credential type and enter the settings for your Entra ID app.
The URLs have this format: https://login.microsoftonline.com/{YOUR_TENANT_ID}/oauth2/v2.0/[authorize|token] - Set Scope to: 'offline_access ChatMessage.Send Chat.ReadWrite'.
- Click on 'Create Code Grant'
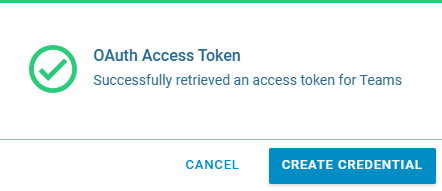
You now need to login with your Microsoft account, if not already logged in, and accept the connection. - If successful you will end up with a confirmation dialog and the final step is to add the credential to the library by clicking on 'Create Credential'.
Using the Chat modules
When sending chat messages you need to reference the destination chat by providing its ID. If you are using Microsoft Teams from your browser, you can find the chat ID in the URL when you open the relevant conversation. The URL will look something like this: https://teams.live.com/_#/conversations/{CHAT-ID}?ctx=chat. If you are using the Teams app these IDs need to be fetched through the API. By using the List Chats module you can make an API request to list all chats you have access to and find their corresponding IDs. The Send Chat module can then be used to send messages to this chat.