Make your flow more resilient
The idea of this article is to give you some best practices in regards to flow resilience. These best practices can either be introduced directly while you design your flow or can be applied later.
It is important to keep in mind that not all of these best practices are useful in all use cases and flow designs.
Sections covered in this article:
- Filters
- Queues
- Try/Except in custom code modules
- Halt on error
- Timeout module
- Module and Node updates
Filters
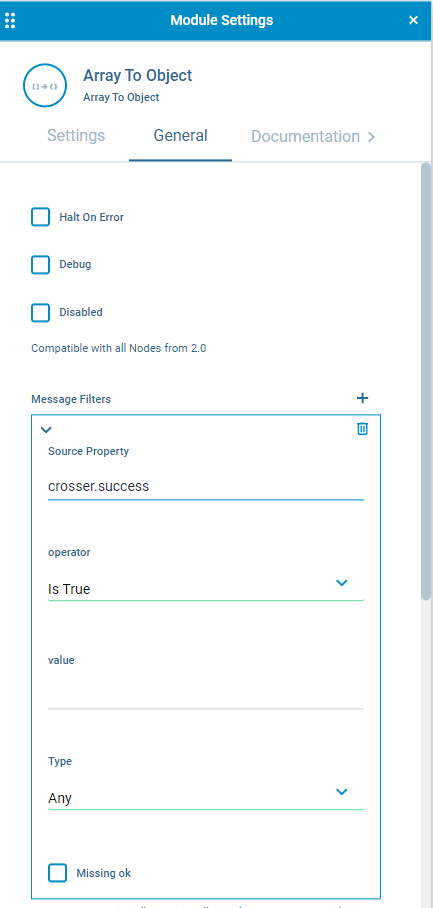
On the “General” tab on every module you can find filters which allow you to specify conditions that a message needs to match to be processed by the module. This can be useful in different situations like only processing data if a specific property is available, the value of a property is below a specific value, or to only process the message if the operation of the previous module was successful.
A successful module operation is indicated by the crosser.success property that will be added to every output of a module. If that property is set to true it means that the module operation was successful, false will be set if there was an issue.
This can be utilized in different cases, most commonly this type of filter is used next to modules that communicate with external systems, like OPC UA Reader, HTTP Request or database modules.
Example
A OPC UA Reader is triggered every second to read specific tags from an OPC UA Server but the OPC UA Server is currently not available. As a result, the OPC UA Reader will generate an empty output with the crosser.success property set to false. If that message is being sent to the next module, often Array Split or Array to Object, these modules will throw warnings as well since the expected source property is not available on the incoming message.

As a result, you will get warnings by several modules in your flow which makes it a bit more tricky to troubleshoot if the flow is more complex.
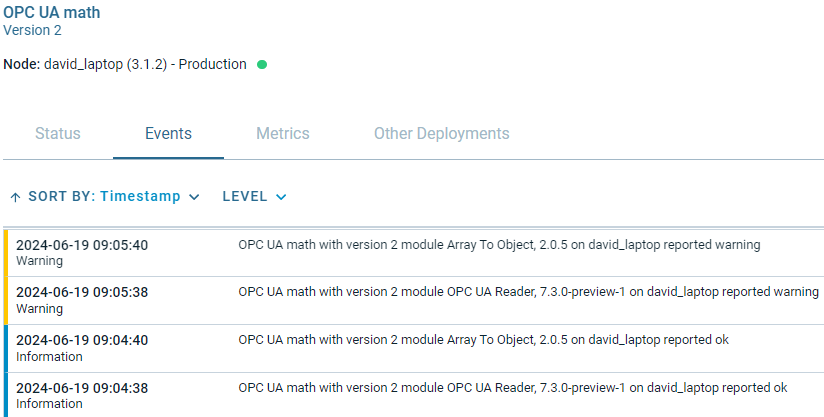
If you set the filter on the Array to Object module to crosser.success = true, you will only see the warning from the OPC UA Reader. The idea is to prevent corrupt messages from being processed as soon as possible.


Queues
Queues are implemented on every module and can be utilized in different ways. One usage is to buffer messages in memory to overcome temporary performance bottlenecks or to buffer messages if the destination system is not available. According to your requirements, you can specify the queue configuration individually on every module.
Example
Let's assume you have a flow that is triggered every second but from time to time the internet connection is down making the Azure EventHubs unavailable. In this case you can pile up messages in the queues to avoid data loss..

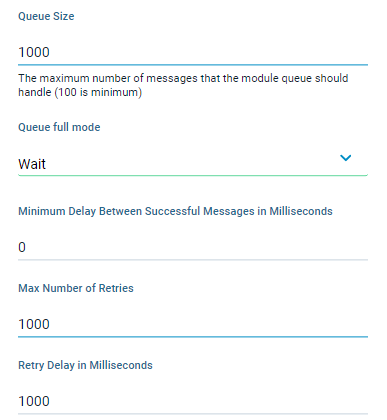
The default size of the queue on every module is set to 100 and mode to Wait, which turns out to be a good starting point. Assuming your interval is set to 1 seconds and you want to cover the situation where your internet connection is down, you can specify the queue size for the expected downtime scenario, ie. 15 minutes which results in a minimum queue size of 900.
In general we recommend adding some margin, just to be sure to cover the expected downtime. In addition the “Max Number of Retries” multiplied by “Retry Delay in Milliseconds” should be greater than the expected downtime divided by the input frequency:
Queue Size (1000) > Input interval * Expected downtime (0.9)
Max Number of Retries/Retry Delay in Milliseconds (1)> Expected downtime/queue size (0.9)
Note that “Queue full mode” “Wait” will create backpressure in case the service is offline for a longer period than expected. In this case the queue of the previous module will fill eventually.
The same concept as shown above can be applied for modules in the middle of the flow as welll.
Read more about queues and retries here: Flow Message Queues and Retries →
Try/Except in custom code modules
If you utilize custom code modules such as Python Bridge, IronPython, C Sharp or Java Script, keep in mind that your code becomes an essential part of the flow. Therefore, we highly recommend to introduce your code in a resilient way, i.e. using Try/Except clauses. Since Crosser has no control over your code you have to make sure by yourself that it can handle situations like “an expected property is not included in the incoming message” and similar situations.
Using Try/Except clauses is a good way of stabilizing custom code modules.
Example
Below you see an example python code which calculates the sum one two values from an incoming message.
import json

def msg_handler(msg, module):
    # Extract value1 and value2 from the message
    value1 = msg['data']['value1']
    value2 = msg['data']['value2']
    # Calculate the sum
    sum_value = value1 + value2
    # Add the result to the message
    msg['data']['sum'] = sum_value
    # Print the modified message for debugging
    print(json.dumps(msg))
    # Pass the message to the next module
    module.next(msg)
Assuming one of the values is for some reason missing on the incoming message, the code will run into issues.
Therefore, we introduce try/except clauses for the msg_handler. Besides that, we recommend to add the reason for the exceptions as well as a property, which indicates if the result is valid or not, to the output message.
import json

def msg_handler(msg, module):
    try:
        # Extract the values from the message
        value1 = msg['data']['value1']
        value2 = msg['data']['value2']
        # Calculate the sum
        result = value1 + value2
        # Add the result to the message
        msg['data']['sum'] = result
        # Mark as valid
        msg['valid'] = True
    except KeyError as e:
        msg['message'] = f"KeyError: {e} - One of the required keys is missing in the incoming message."
        msg['valid'] = False
    except TypeError as e:
        msg['message'] = f"TypeError: {e} - Incoming values must be numbers."
        msg['valid'] = False
    except Exception as e:
        msg['message'] = f"UnexpectedError: {e}"
        msg['valid'] = False
    # Always forward the (possibly modified) message
    module.next(msg)
Halt on error
The feature “Halt on Error” is designed to react based on critical errors within a flow or a module. The setting can be specified on Flows and Modules. As a result, you can specify under which circumstances you want to stop or restart the flow.
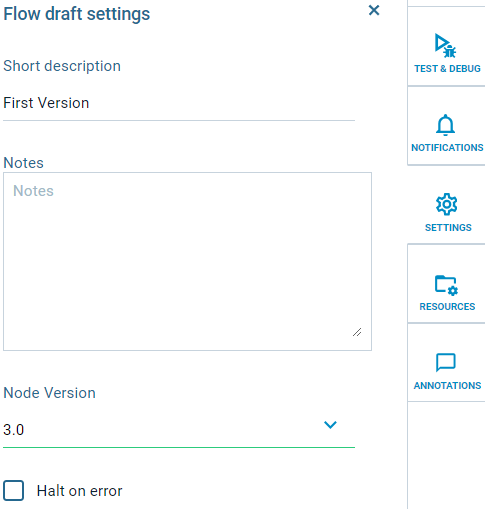
Open the Settings panel on the right-hand side in the Flow Studio.
Open the “General” tab on module settings.

Examples
If Flow:HaltOnError is true, if any module enters an error state the flow will be stopped and will not be restarted. Same thing if crashes.
If Flow:HaltOnError is false, if the flow stops the Node will try to restart it.
If Module:HaltOnError is true, any error from the module will stop the flow. What happens then depends on the flow setting.
If Module:HaltOnError is false, the flow will not stop if the module enters an error state. It is then up to the module to recover
The default is for all HaltOnError settings to be off, i.e. the Node will try to keep the flow running, independent of any errors.
|
Don’t stop flow |
Stop flow |
Restart Flow |
|
|
HaltOnError |
flow=false, module=false |
flow=true, module=false |
flow=false, module=true |
Timeout module
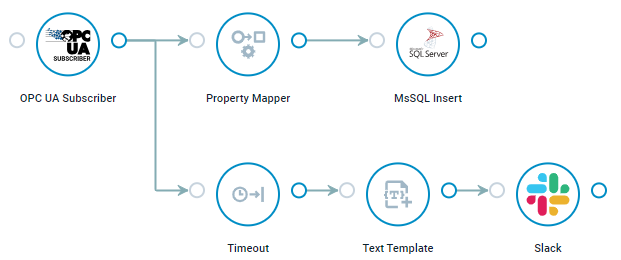
The timeout module is a fairly simple module which fires out a message if specific properties on the incoming message have not been received within the specified timeout range. Although this is not directly related to flow resilience it can still help you to understand whether or not you receive the data from source systems as expected.
Example
Let’s say you are subscribing to an OPC UA Server and expect a certain property at least every 5 minutes. If that is not the case you want to send out a notification to someone since you expect some sort of malfunction of the machine. In such a scenario you can use the timeout module to fire out a message and notify someone, or trigger another action according to your requirements.
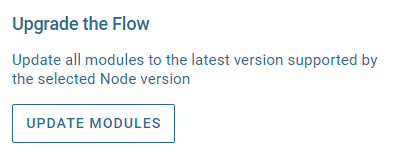
Module and Node updates
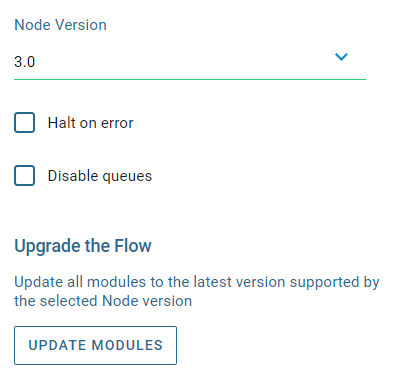
Crosser is continuously working on improving the solution not only from the feature perspective but of course also from the stability standpoint. We publish module updates on a weekly basis including bug fixes, new features, improved user experience and also updates of the underlying libraries. It is up to you which version of a module you want to use in a flow but as a general recommendation you should also use the latest version. You can update all modules from a flow within the Flow Studio with just one click. Open the ‘Settings” on the right-hand side-panel and click ‘UPDATE MODULES’.
Beside that, new Node releases are being published approximately 4 times a year. Similar to the modules, those Node updates and upgrades also come with improvement based on experience gathered in our customer base.
When upgrading your Node(s) keep in mind to also upgrade your Node version in the Flow settings.
We recommend staying up-to-date with Node and Module versions as much as possible.# Always forward the (possibly modified) message# Always forward the (possibly modified) message